Hey there, fellow gardening enthusiasts! I'm a supplier of garden hose couplings, and I know how important it is to have a properly connected drip irrigation system. A well - set - up drip irrigation system can save you time, water, and keep your plants healthy. In this blog, I'll walk you through how to connect a garden hose coupling to a drip irrigation system.
Understanding the Basics
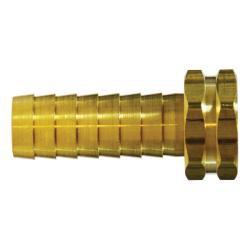
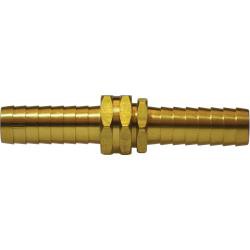
First things first, let's talk about what we're working with. A garden hose coupling is a device that connects your garden hose to other equipment, like a drip irrigation system. It's usually made of materials like brass or plastic. Brass couplings, like the Rod Brass Long 2 Shank and Rod Brass 2 Shank, are durable and resistant to corrosion, making them a great choice for long - term use.
Drip irrigation systems, on the other hand, deliver water directly to the base of your plants, minimizing water waste through evaporation and runoff. They consist of tubing, emitters, and connectors that work together to ensure your plants get the right amount of water.
Tools You'll Need
Before you start the connection process, gather the necessary tools. You'll need a pair of pliers, a sharp utility knife, and Teflon tape. The pliers will help you tighten the couplings securely, the utility knife is for cutting the tubing, and the Teflon tape is used to create a watertight seal on threaded connections.
Step 1: Choose the Right Coupling
The first step in connecting your garden hose to a drip irrigation system is to choose the right coupling. Consider the size of your garden hose and the drip irrigation tubing. Most garden hoses have a standard 3/4 - inch or 5/8 - inch diameter, while drip irrigation tubing can vary from 1/4 - inch to 1/2 - inch.
If your hose and tubing have different sizes, you'll need a coupling that has different ends to match them. For example, if your garden hose is 3/4 - inch and your drip irrigation tubing is 1/2 - inch, look for a coupling with a 3/4 - inch female end to connect to the hose and a 1/2 - inch male end to connect to the tubing.
Step 2: Prepare the Garden Hose
Start by turning off the water supply to your garden hose. This is a crucial safety step to prevent any water spills during the connection process. Then, use the pliers to loosen and remove the existing end cap or connector from the garden hose. Make sure to clean the end of the hose to remove any dirt or debris that could affect the connection.
Step 3: Apply Teflon Tape
If your coupling has threaded ends, apply Teflon tape to the male threads. Wrap the tape around the threads in a clockwise direction, making sure to cover all the threads. This will create a tight seal and prevent leaks. You should wrap the tape about 3 - 4 times around the threads.
Step 4: Connect the Coupling to the Garden Hose
Once you've applied the Teflon tape, screw the coupling onto the end of the garden hose. Use the pliers to tighten the coupling, but be careful not to overtighten it as this could damage the threads. You should feel a firm resistance when the coupling is properly tightened.
Step 5: Prepare the Drip Irrigation Tubing
Next, measure and cut the drip irrigation tubing to the desired length using the utility knife. Make sure to cut the tubing at a 90 - degree angle for a clean and even cut. This will ensure a proper connection with the coupling.
Step 6: Connect the Coupling to the Drip Irrigation Tubing
There are different types of connections for drip irrigation tubing. Some couplings have barbed ends that you can simply push into the tubing. If your coupling has barbed ends, wet the end of the tubing to make it easier to slide onto the barb. Push the tubing onto the barb until it's fully seated. You can use the pliers to give it a gentle tug to make sure it's secure.
Other couplings may have threaded connections for the tubing. In this case, apply Teflon tape to the male threads and screw the tubing connector onto the coupling. Again, use the pliers to tighten it properly.
Step 7: Check for Leaks
After you've connected the coupling to both the garden hose and the drip irrigation tubing, turn on the water supply slowly. Check all the connections for any signs of leaks. If you notice a leak, turn off the water and tighten the connection further using the pliers. You may also need to add more Teflon tape if the leak persists.
Step 8: Set Up the Drip Irrigation System
Once you've confirmed that there are no leaks, you can set up the rest of your drip irrigation system. This may involve adding emitters, splitters, and other components to ensure that water is distributed evenly to all your plants.
Troubleshooting Tips
- Leaks: If you still have leaks after tightening the connections, check the Teflon tape. Make sure it's wrapped correctly and covers all the threads. You may also need to replace the coupling if it's damaged.
- Low Water Pressure: If you're experiencing low water pressure in your drip irrigation system, check for any kinks in the tubing. Also, make sure that the emitters are not clogged. You can clean the emitters by soaking them in a solution of water and vinegar.
Conclusion
Connecting a garden hose coupling to a drip irrigation system isn't as complicated as it may seem. By following these steps and using the right tools, you can have a properly functioning drip irrigation system in no time.
As a garden hose coupling supplier, I offer a wide range of high - quality couplings to meet your needs. Whether you're looking for a simple connector or a more specialized coupling, I've got you covered. If you're interested in purchasing our products or have any questions about connecting your garden hose to a drip irrigation system, feel free to reach out for a procurement discussion.
References
- "Gardening for Beginners: Drip Irrigation Systems" by Green Thumb Press
- "The Ultimate Guide to Garden Hose Fittings" by Home Gardening Magazine


