Installing a garden hose nut on a hose without causing damage is a skill that every gardener and homeowner should master. As a leading supplier of garden hose nuts, we understand the importance of a proper installation. In this blog, we'll guide you through the process step - by - step, ensuring that your hose and nut remain in top - notch condition.
Understanding Garden Hose Nuts
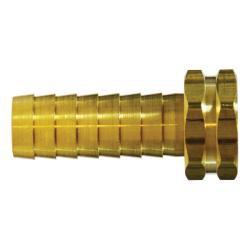
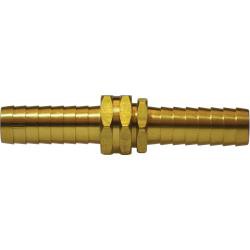
Before we dive into the installation process, it's crucial to understand the different types of garden hose nuts available. At our company, we offer a wide range of high - quality garden hose nuts, such as the Rod Brass 2 Shank and the Rod Brass Long 2 Shank. These nuts are made from durable materials like brass, which offers excellent resistance to corrosion and wear.
The choice of the nut depends on your specific needs. The Rod Brass 2 Shank is a great option for standard applications, providing a secure connection. On the other hand, the Rod Brass Long 2 Shank is ideal for situations where you need a longer reach or a more robust connection.
Tools Required
To install a garden hose nut without damaging the hose, you'll need a few essential tools:
- Adjustable Wrench: This tool is used to tighten the nut properly. Make sure to choose a wrench that fits the size of the nut.
- Teflon Tape: Also known as plumber's tape, Teflon tape helps create a watertight seal between the nut and the hose fitting.
- Scissors: You'll need scissors to cut the Teflon tape to the appropriate length.
Step - by - Step Installation Process
Step 1: Prepare the Hose
The first step is to prepare the end of the hose where you'll be installing the nut. Start by inspecting the hose for any signs of damage, such as cuts or cracks. If you find any damage, it's best to replace the hose to ensure a proper and leak - free connection.
Next, clean the end of the hose thoroughly. Remove any dirt, debris, or old tape from the hose fitting. A clean surface will ensure a better seal and a more secure connection.
Step 2: Apply Teflon Tape
Take the Teflon tape and start wrapping it around the male threads of the hose fitting. Wrap the tape in a clockwise direction, making sure to overlap each layer slightly. You should wrap the tape around the threads about 3 - 5 times. This will create a smooth surface and help prevent leaks.
Once you've wrapped the tape to the desired length, use the scissors to cut the tape. Be careful not to leave any loose ends, as they can interfere with the installation of the nut.
Step 3: Place the Nut on the Hose
Now, take the garden hose nut and place it over the end of the hose. Make sure that the nut is oriented correctly, with the threaded side facing the hose fitting.
Slowly start threading the nut onto the male threads of the hose fitting. Turn the nut clockwise by hand until it is finger - tight. This initial hand - tightening helps ensure that the nut is properly aligned with the threads.
Step 4: Tighten the Nut
Once the nut is finger - tight, it's time to use the adjustable wrench to further tighten it. Place the wrench around the nut, making sure that it fits snugly. Then, turn the wrench clockwise to tighten the nut.
Be careful not to over - tighten the nut, as this can damage the hose or the nut itself. A good rule of thumb is to tighten the nut until it is snug, with a slight additional quarter - turn. This will create a secure and leak - free connection without causing any damage.
Step 5: Check for Leaks
After tightening the nut, turn on the water supply to the hose. Check for any signs of leaks around the connection. If you notice any leaks, you may need to tighten the nut a little more or add an extra layer of Teflon tape.
Common Mistakes to Avoid
- Over - tightening: As mentioned earlier, over - tightening the nut can cause damage to the hose and the nut. Use a gentle touch when tightening the nut with the wrench.
- Using the Wrong Size Wrench: Make sure to use a wrench that fits the size of the nut. A wrench that is too large or too small can make it difficult to tighten the nut properly and may cause damage.
- Not Cleaning the Hose: Failing to clean the end of the hose before installation can lead to a poor seal and leaks. Always take the time to clean the hose thoroughly.
Maintenance Tips
Once you've installed the garden hose nut, it's important to maintain it properly to ensure its longevity.
- Regular Inspections: Periodically inspect the nut and the hose connection for any signs of wear or damage. Look for leaks, cracks, or loose connections.
- Store Properly: When not in use, store the hose and nut in a cool, dry place. Avoid exposing them to extreme temperatures or direct sunlight, as this can cause the materials to deteriorate.
- Replace When Necessary: If you notice any significant damage to the nut or the hose, replace them as soon as possible. This will help prevent leaks and ensure the proper functioning of your garden hose.
Conclusion
Installing a garden hose nut on a hose without damaging it is a straightforward process if you follow the right steps. By understanding the different types of nuts available, using the correct tools, and following our step - by - step guide, you can achieve a secure and leak - free connection.
As a trusted garden hose nut supplier, we are committed to providing you with high - quality products and valuable information. If you have any questions about our products or the installation process, or if you're interested in purchasing our garden hose nuts, we encourage you to contact us for further discussion. We look forward to serving your garden hose nut needs.
References
- "Home Plumbing Basics" by DIY Network
- "Gardening Tool Maintenance Guide" by The Old Farmer's Almanac


